Setting up a VVX phone for Provisioning without DHCP
Setting up VVX's Phones to test without DHCP
When testing Enoten's Provisioning Software with a few devices you may not want to setup DHCP at this stage. The easiest way to make the changes required is to set the provisioning Bridge details directly on the phone. This can be done in 2 different ways. The easiest being through the phone's web GUI alternatively you can do it directly on the phone.
Note: The Enoten term Provisioning Bridge and Polycom term Provisioning Server are the same server. As Enoten UDM Pro uses two servers for provisioning to avoid confusion we call the server that delivers the configuration the Provisioning Bridge.
Setting up the Provisioning Bridge through the VVX web GUI
First you will need to find the phone's IP address, if you do not know what it is you can find it through the phone interface. If you know the IP address you can skip to Step 2 Check web interface is enabled.
Step 1 Find Phone IP Address
When you press the Home key on a VVX phone you are taking to a menu of selections the layout is dependent on the type of phone used. In this example we are using a VVX600 but it will be similar for other devices.
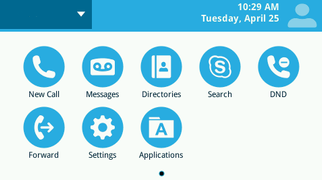
From the menu select "Status"
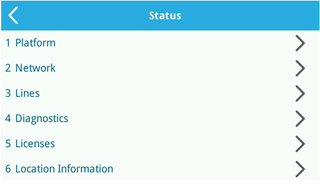
The various options for Status will be displayed and we need to select "Network"
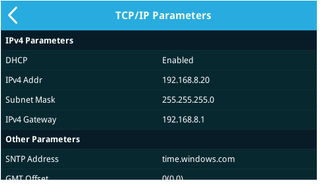
From the "Network" menu select "TCP/IP Parameters"

Finally your IPv4 Addr will be displayed. If the address is not populated correctly for the network you are on you will need to investigate this before starting. Setting up of the phone on the network is outside the scope of this guide.
The next step after obtaining the IP address is to check the webserver is enabled if you want to configure with web interface. If you wish to continue configuring on the phone go to Step 4: Setup the Provisioning Server with Phone Interface
Step 2 Check Web Server Interface
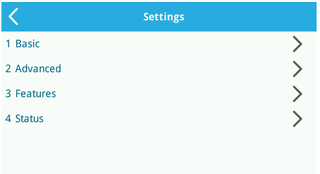
You can either step back through the menu or press the home key and select "Settings" again. Once you are at the "Settings" menu select "Advanced"
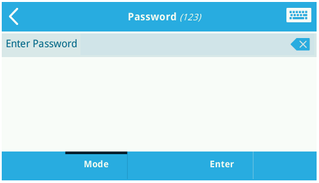
When you select "Advanced" you will be prompted for a password. You will need to check your Polycom documentation for the default password or if the password have been changed consult your internal documentation.
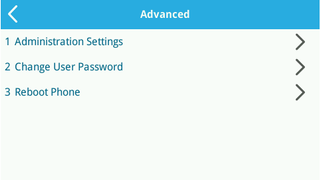
Once logged in select "Administration Settings"
The "Administration Settings" menu goes over a number of pages.
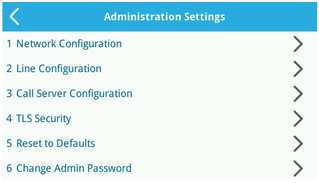
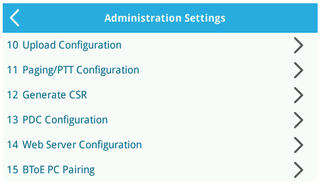
Scroll down to the bottom and select "Web Server Configuration"
To access the phone remotely the "Web Server" will need to be set to Enabled and the "Web Config mode" will define how you wish to access the phone. Select the option most appropriate to your environment.
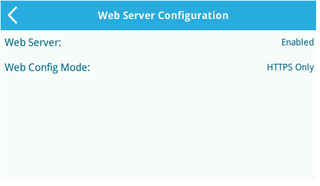
If you change the settings and exit the page you will be prompted to "Save Config", select this. The phone may reboot at this point.

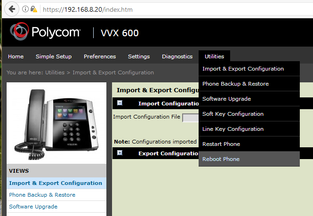
Step 3 Setup the Provisioning Bridge with Web Interface
You can either setup the Provisioning Bridge through the Web Interface now or continue with the phone interface in Step 4.
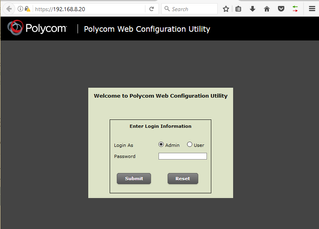
Connect to your phone https://IPaddress and logon to Admin with the Admin password.
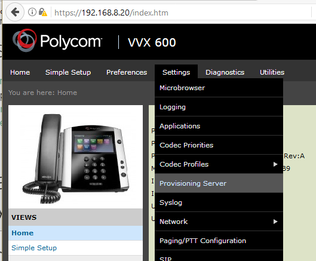
From the "Settings" menu select the "Provisioning Server" option
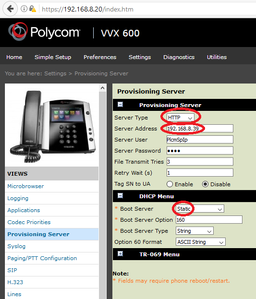
In the "Provisioning Server" Menu set the "Server Type" as HTTP and the "Server Address" as the IP Address or FQDN of the Provisioning Bridge. The other settings can be ignored.
The phone is now setup to provision from the Enoten Provisioning Bridge you do not need to perform Step 4. Select the "Reboot phone" option and the phone will restart and pull its configuration from the Provisioning Bridge.
If you experience issues at this point please contact Enoten Support on support@enoten.com
Step 4: Setup the Provisioning Server with Phone Interface
This step is only if you do not want to use the web interface to configure the Provisioning Bridge.
Press the Home key on a VVX phone to go to phones menu. The layout is dependent on the type of phone used. In this example, we are using a VVX600 but it will be similar for other devices.
From the menu select "Advanced"
When you select "Advanced" you will be prompted for a password. You will need to check your Polycom documentation for the default password or if the password have been changed consult your internal documentation.
Select "Administration Settings"
Select "Network Configuration"
Then select "Provisioning Server"
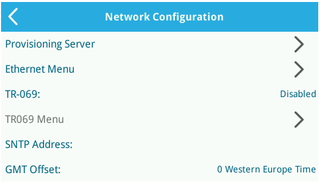
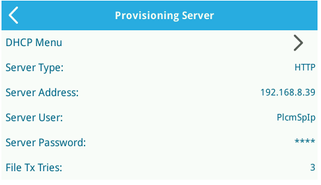
The current settings are displayed
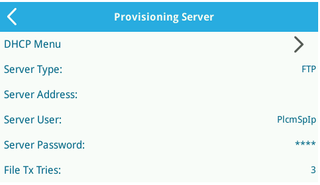
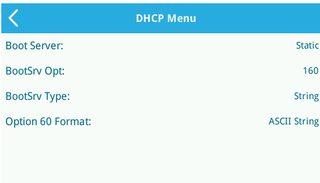
Firstly, you need to select the DHCP Menu
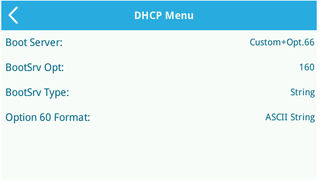
Change the "Boot Server" option to Static then go back to the "Provisioning Server" settings
In the "Provisioning Server" settings change the "Server Type" to HTTP and set the "Server Address" to the IP or FQDN of the Enoten Provisioning Bridge Note for UDM Express only you also need to add the port address as :81 to the IP or FQDN.
When you complete the changes, and press back to leave the page you will be prompted to "Save Config". Select this and go back to the Administration Screen.
The phone is now setup to provision from the Provisioning Bridge. On the "Administration Settings" screen select reboot and the phone will restart and will pull its configuration from the Provisioning Bridge
If you experience issues at this point please contact Enoten Support on support@enoten.com